Introduction
The problem I had and have with the usual KVM over IP-switches, is that I want a solution so I can remotely control my Proxmox/pfSense-server, even if my whole network is down – which it can or will be, if either Proxmox or pfSense misbehaves, for whatever reason.
As described in earlier blog posts, my Proxmox-server runs pfSense virtualized and this virtual server/machine (VM) controls my whole LAN/VLAN-setup – see e.g. these posts for more background information:
- https://mfj.one/2022/12/why-i-think-everyone-should-do-network-segmentation-and-how-to-do-it/
- https://mfj.one/2022/12/why-im-using-pfsense-and-a-brief-walkthrough-of-my-setup-part-2-2/
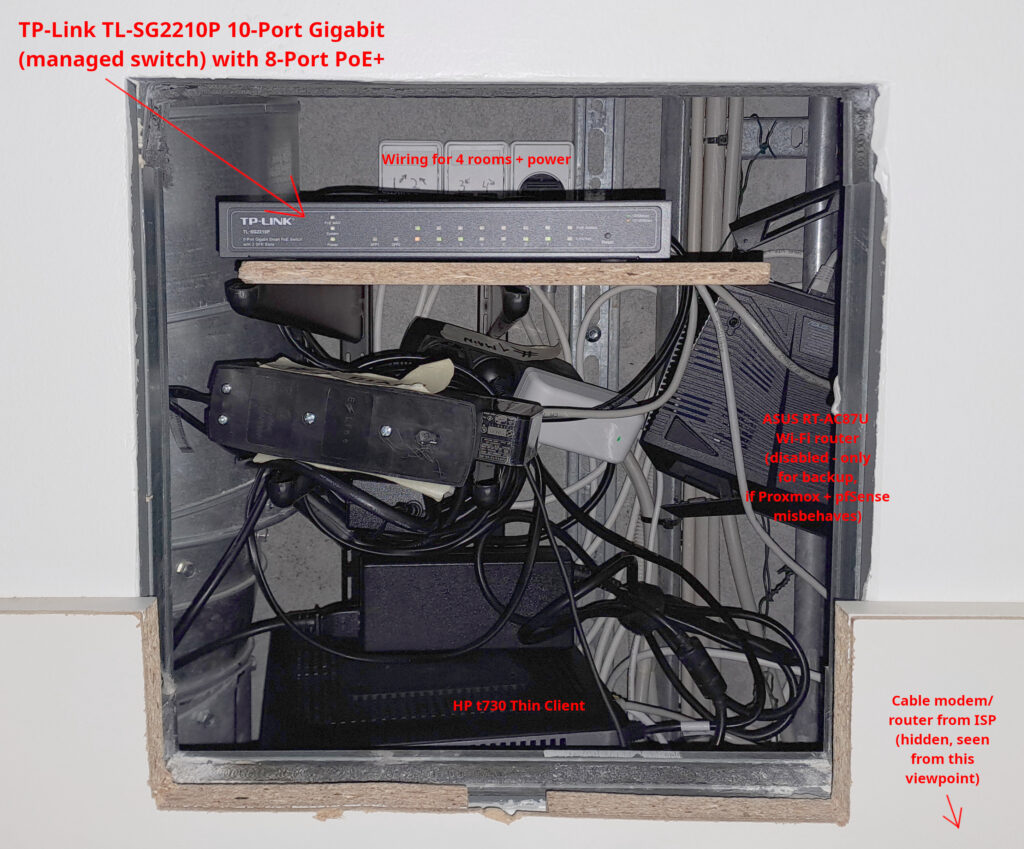
Here’s a picture of the core of my home network setup:
And, if anyone reaches this point without knowing it: KVM in this context is an abbreviation for “Keyboard, Video (monitor), Mouse”. IP in this context is just TCP/IP (Transmission Control Protocol/Internet Protocol).
KVM over IP (wired/wireless) is a device that allows to remotely access a computer/server over a network – that’s what the following is about…
Description of the problem
In case I screw something up with my Proxmox/pfSense-server and e.g. lock my self out due to some misconfigured setting or if it’s the system itself that e.g. due to an upgrade, incompatibility or hardware fault suddenly won’t work, all my devices will lose the connection to my router and all my devices can’t access the internet – or each other in the LAN.
I have a backup router, the Asus RT-AC87U, that I can temporarily plugin and turn on (shown to the right in the image above) – but only for emergencies, if all else fails. When I screw something up and lose my whole network (you don’t learn anything if you never screw something up) – a very annoying, tedious process starts:
I have to unplug all cables from the Proxmox-server (HP t730 in the lower parts of the image), move it into my home office, plugin a keyboard and monitor (optionally a mouse) – boot up the system, restore from a backup or otherwise fix the system via manual settings or SSH. Once it works, I put back the machine, plug all the cables back – cross my fingers that I didn’t forget anything or the whole process starts over again.
Narrowing down which KVM-solution could solve the problem
KVM-switches in general solve this problem, so I can leave everything in place and still remotely access to the Proxmox-/pfSense-server. But I didn’t want a solution with new/additional cables, because I have a solution with 4 small plastic PVC conduits with cat 5e-cables to 4 different rooms and there isn’t room for another cable. Furthermore I would have a problem with making room for another outlet and the solution is just not very flexible in case I later change my mind and cabling has to be changed.
I looked at different options in the market and traditional KVM over IP-switches exists but I thought to myself: What good is such a solution, if my whole network goes down? It’s useless without a router, because then I cannot access the router’s administration/admin page and that defeats the whole purpose or idea.
I also think many of these solutions were pretty expensive (and probably mostly used in corporate environments) as I imagine not many consumers want to pay >1000 USD for such a solution, in a home setup. After Googling and considering the different options with help from e.g. Amazon and Ebay, I found the solution and it was or is a great solution in several ways:
- It’s Linux-based, i.e. based on open source code and therefore “hacker-friendly” (in case I want to customize or modify something)
- It’s based on Raspberry Pi, which can also be used for a lot of fun home-automation stuff, should I ever decide to dig into that (I later bought another Raspberry Pi for this, so I have an extra for experiments)
- It works even if my whole network goes down because it’s wireless and this feature is just so much better than what many of the more expensive alternatives offered
- This KVM-solution is also an alternative to buying a computer/server with Intelligent Platform Management Interface (IPMI) – except IPMI is built for that single motherboard and the BLiKVM-solution is for pretty much all motherboards because it takes the HDMI-video output and simulates keyboard/mouse via a standard USB-port.
- It’s cheap (both compared to the expensive corporate KVM-switches I also considered and also compared to a server with IPMI-module)
On the negative side, it’s not as user friendly as typical commercial / consumer products are and I also spent a lot of time tweaking and figuring out how I wanted it to work.
Buying a BliKVM CM4-box and a Raspberry Pi CM4
The solution I ended up with, was buying a BliKVM CM4. The “CM4”-part means it’s based on the Raspberry Pi Compute Module 4. The CM4 incorporates e.g. a quad-core ARM Cortex-A72 processor and is widely used in embedded applications. For a general overview of the solution, please see additional details here:
One of the problems with buying Raspberry Pi’s is that they’re out of stock, almost everywhere (at least most of year 2022 and beginning of 2023). It wasn’t easy to get my hands on the CM4, but I can highly recommend using https://rpilocator.com/ for finding online shops that have the CM4 in stock.
Since I live in the EU, I bought both of mine from Poland – https://botland.com.pl/ – they shipped fast and I could track the package and there were absolutely no problems, after I ordered. Ordering the BliKVM was never a problem, but since it’s being shipped from Hong Kong or China, delivery time is longer (I think I waited around 2 weeks or so, to Scandinavia).
Preparations and initial findings
It took a while before I figured out how I wanted things, so I didn’t knew what the end result would be, but I knew it ran Linux and therefore was flexible. One should start at https://wiki.blicube.com/blikvm/en/BLIKVM-CM4-guide/ and then begin to flash the CM4 using the instructions at https://wiki.blicube.com/blikvm/en/flashing_os/.
It took a while (many hours) to figure out the details but there’s also excellent tech-support in a Discord-channel, which I had to use twice before I ended up being happy. I’ll go through the issues I had to overcome before being happy with the solution:
Problem 1: Enabling wireless access via the hotspot.sh-script
I bought the CM4 with WiFi (and bluetooth) so I had a solution that would work, just by connecting a laptop to a WiFi-hotspot whenever I need/needed the BLiKVM. This made the solution independent of cables – and it’s a perfect solution for me.
With Linux it’s normally not a big problem for me to create a WiFi-server or wireless access point. So I started looking through e.g. the Arch Linux Wiki for information about how to setup a hotspot, install and configure hostapd and dnsmasq and during that process I began following the “tech-support”-channel from the BLiKVM Discord-server. I got lazy and instead of inventing the wheel from scratch, I asked if anyone had done it before me: To make the BLiKVM automatically start up a WiFi hotspot, that I can connect to and access the KVM-features. Luckily this solution had already been made. So I took the easy/lazy/quick solution and am sharing it here, in case anyone wants to do as I did:
- First flash the BLiKVM-image and it’s important to use the image obtained from Google Drive with the link from (the section “Download the image” and “PiKVM image (BLIKVM-CM4)”: https://wiki.blicube.com/blikvm/en/flashing_os/ (WARNING: DO NOT USE THE IMAGE OBTAINED USING THE DOWNLOAD-BUTTON HERE: https://www.blicube.com/blikvm-products/)
- Download the “hotspot”-script from (latest version) https://kvmnerds.com/PiKVM/hotspot – or find a previous version at https://github.com/srepac/pikvm/blob/master/hotspot
You might want to edit e.g. the SSID name, passphrase and network to your liking, before running the script using “./hotspot.sh -f” where the “-f” option will make the hotspot work automatically on every reboot.
Problem 2: The download-link for the image used for flashing was wrong
After having flashed the CM4 with different images a few times and learned (a bit about) the different Raspberry-Pi Linux-distributions I decided I wanted to wrap this up and ensure that everything worked. I spent some hours looking into the BLiKVM-solution and I found out that the “KM”-part, i.e. the keyboard and mouse didn’t work:
- At first it was very typical that the mouse just moved by itself in a repeatedly, linear infinite pattern.
- The keyboard never worked.
- The keyboard and mouse indicator lights were at random times green (meaning “ok”) and other times orange-coloured (meaning “not ok”) – see screenshots a bit below.
- Later, after some reboots most often the mouse never worked at all.
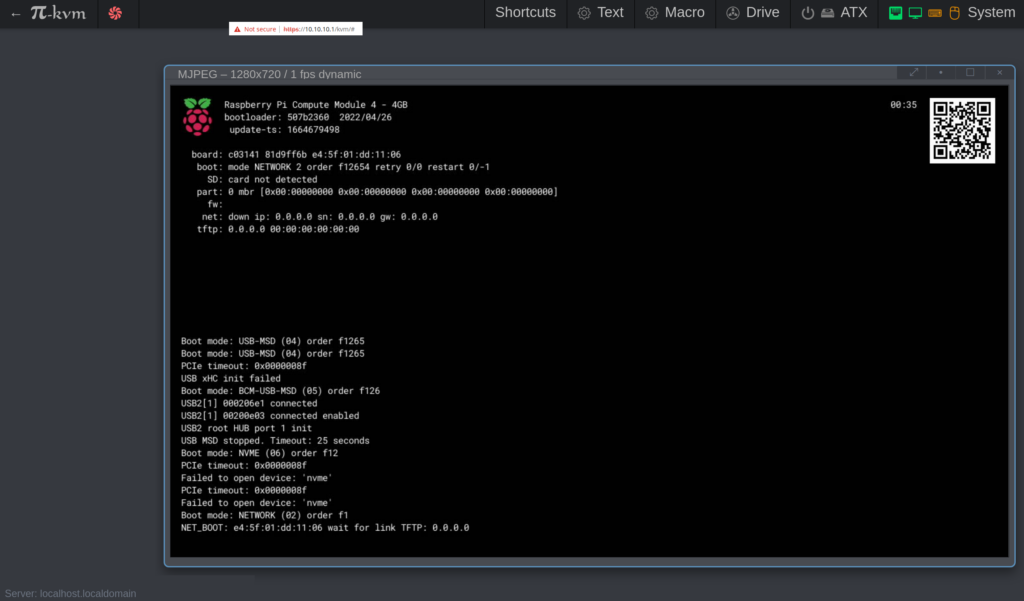
Such problems would never have happened with a more commercial/consumer-oriented product. But I’ve asked for trouble myself by buying a Linux-product that I wanted to customize myself and one should never do that, if one doesn’t like the challenge in fixing the problem and doesn’t have the patience or hours needed.
I wrote and asked for support in the “tech-support”-channel and eventually found out that I had used the wrong image.
The download-link pointed to a wrong image
After banging my head against the wall I found out what I’ve also explained above:
- The download-button for the webpage: https://www.blicube.com/blikvm-products/ – is wrong and this is probably the image I used, when my (virtual) keyboard and mouse didn’t work (at least it was wrong on January 3rd 2023, it might be fixed after this).
- I later attempted to use the image obtained from https://wiki.blicube.com/blikvm/en/flashing_os/ which points to a Google Drive-file – see the section “Download the image” and “PiKVM image (BLIKVM-CM4)” – and then everything, i.e. virtual keyboard and mouse worked as it should.
- I asked in the Discord-channel: “Why are there links to two different images” and received the answer that I should use the image from Google Drive only – which is also the image that worked. Furthermore, I was told that a work order had now been placed, for updating the link to the correct link so in the future, this might not be an issue at all for people trying to do the same as I did.
This is what I like and think is extremely satisfactory about Linux: When you contribute to or solve something using open source, in a way that nobody or not many people have done before you. It’s challenging and rewarding to solve such problems…
A nearly perfect KVM over IP-solution with built-in wireless WiFi-hotspot
Below are shown some additional screenshots that hopefully illustrate a bit more details, about why this is a good KVM-solution:
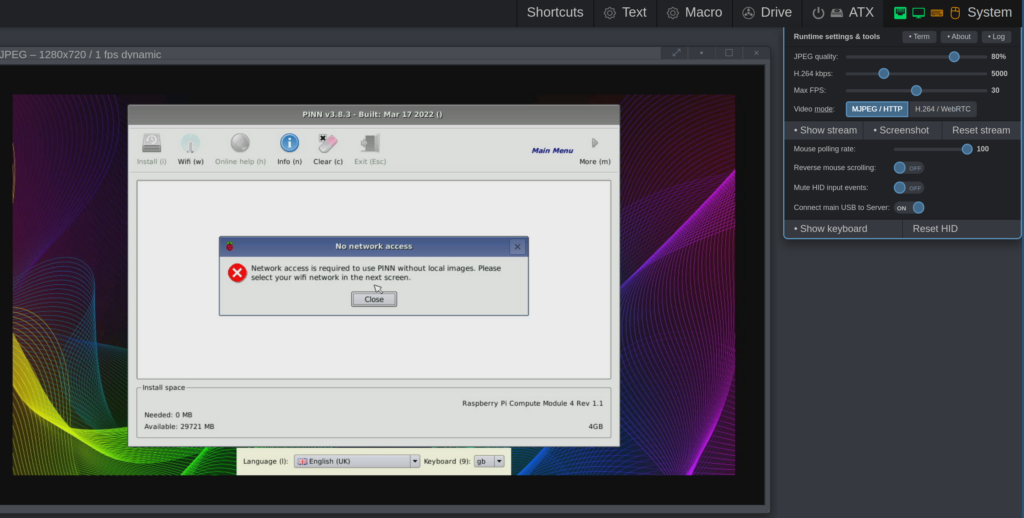
The screenshot above illustrates the issue I had, when neither the virtual mouse or keyboard worked, but it also shows some additional settings. I decided to use the BliKVM (hotspot/WiFi) server IP address: 10.10.10.1, to avoid a potential conflict with 192.168.1.1 in case I use my laptop with both a cable to the normal LAN and at the same time connect to the BLiKVM hotspot.
Once the Raspberry Pi boots up into one of the graphical display modes, one can see something like shown above or below:
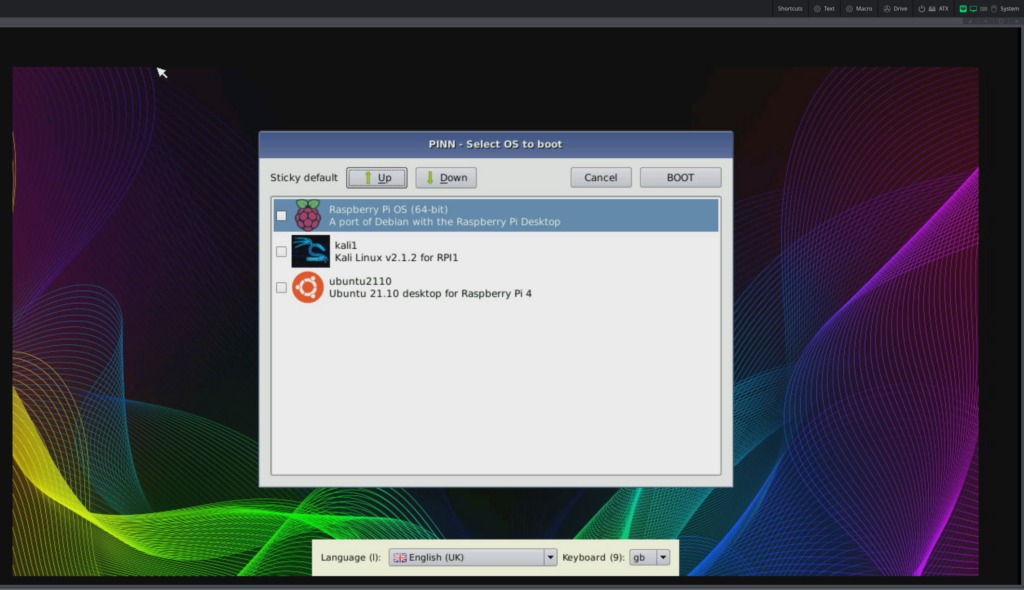
The last screenshot is taken after I reflashed the BLiKVM with the correct image (from Google Drive). The BLiKVM-box also works on other machines.
Using the BLiKVM-box for remote administration of my Proxmox- (=virtualized pfSense) server
One is also able to e.g. enter BIOS-setup and use mouse and keyboard, from the beginning i.e. before the operating system has been loaded. The only minor “problem”, is that there’s a delay of maybe around 0.5-1 second (especially for IP over WiFi instead of LAN). On the other hand I think it’s not an unusual or unexpected problem for a KVM-switch that communicates entirely wireless. As long as the BIOS-delay is maybe 5-10 seconds, this is absolutely no problem at all as shown below:
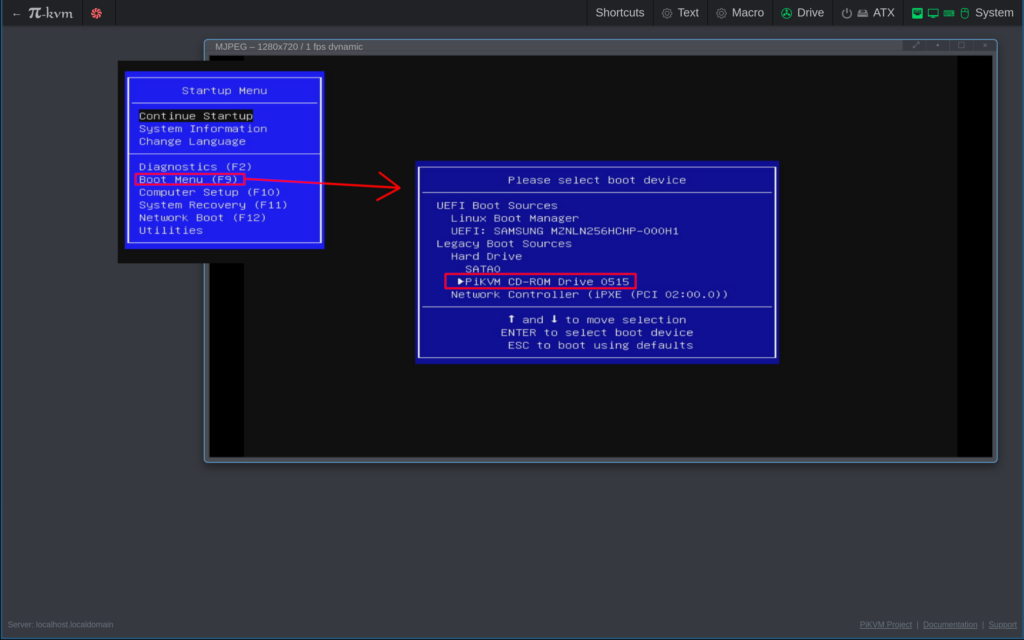
Notice everything is green in the upper right corner…
Problem 3: Unable to upload image-file for virtual CD-ROM
Unfortunately I seem to have lost a few screenshots along the way, but for illustrative purposes take a look at the screenshot below:
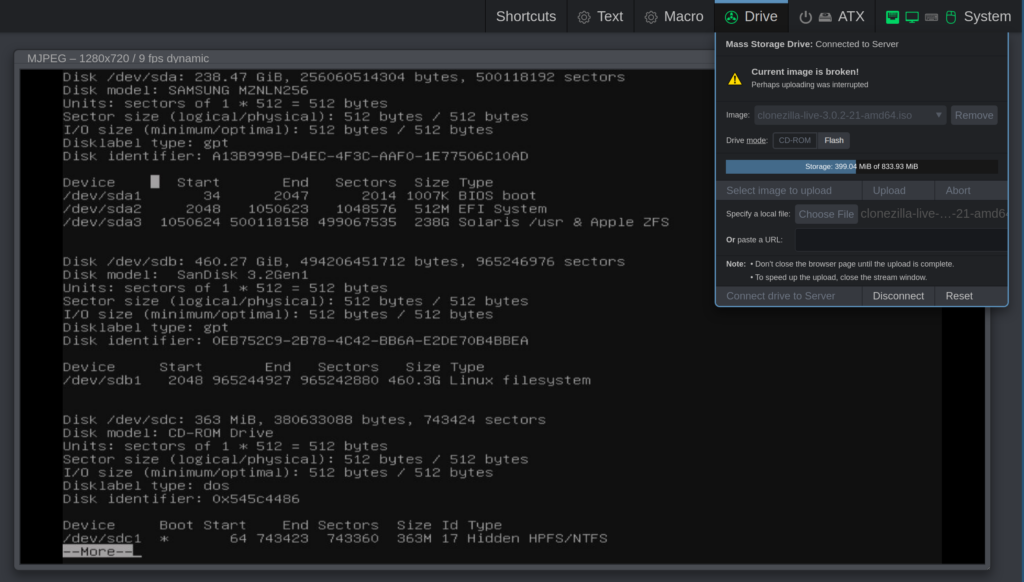
Initially I tried to upload the virtual CD-ROM-image using the GUI and I even think I tried 2-3 times. After around 25% it stopped with the error seen below and I took a screenshot:
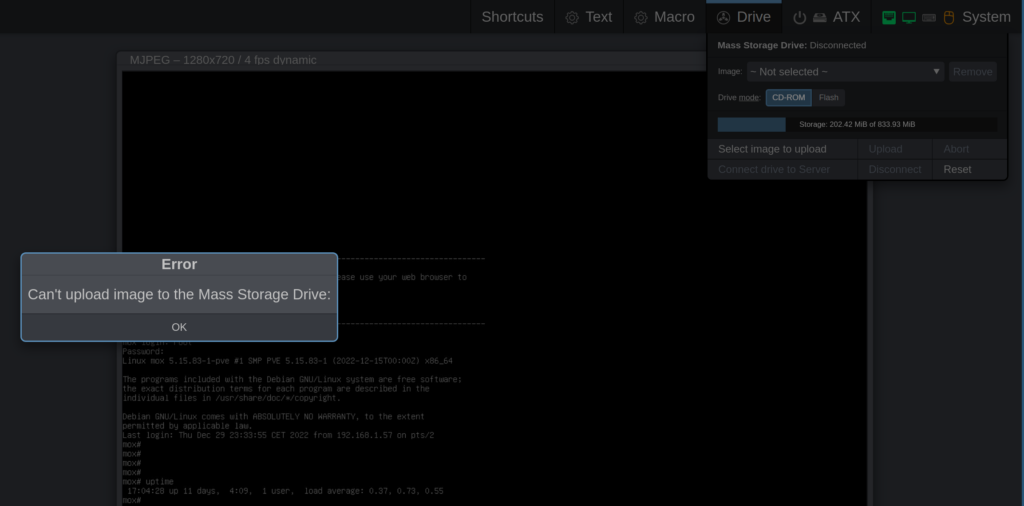
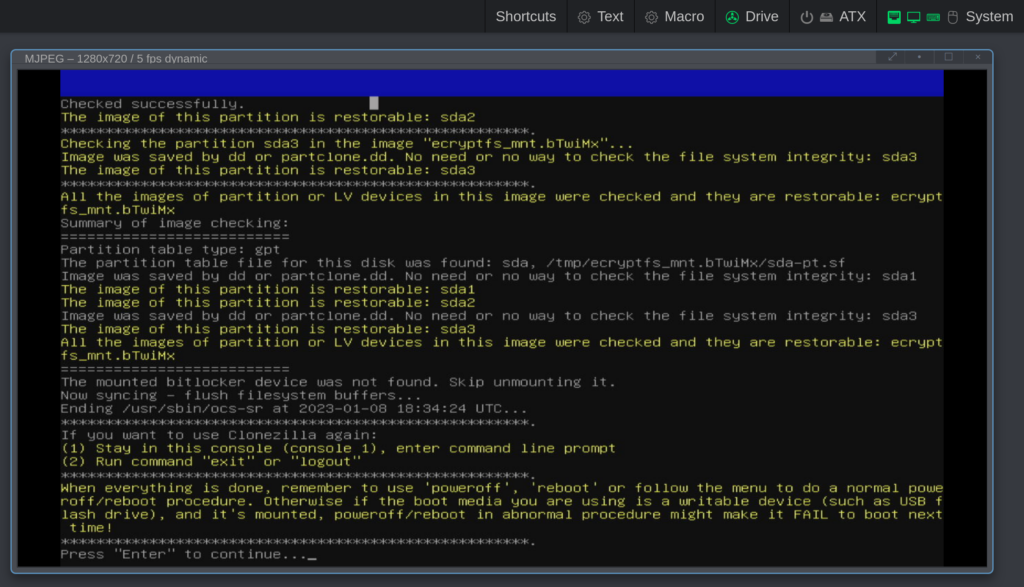
I was trying to upload Clonezilla so I could take a full backup of the harddrive. Luckily, there is a solution consisting of 4 steps described at https://docs.pikvm.org/msd/#upload-images-manually-without-web-ui:
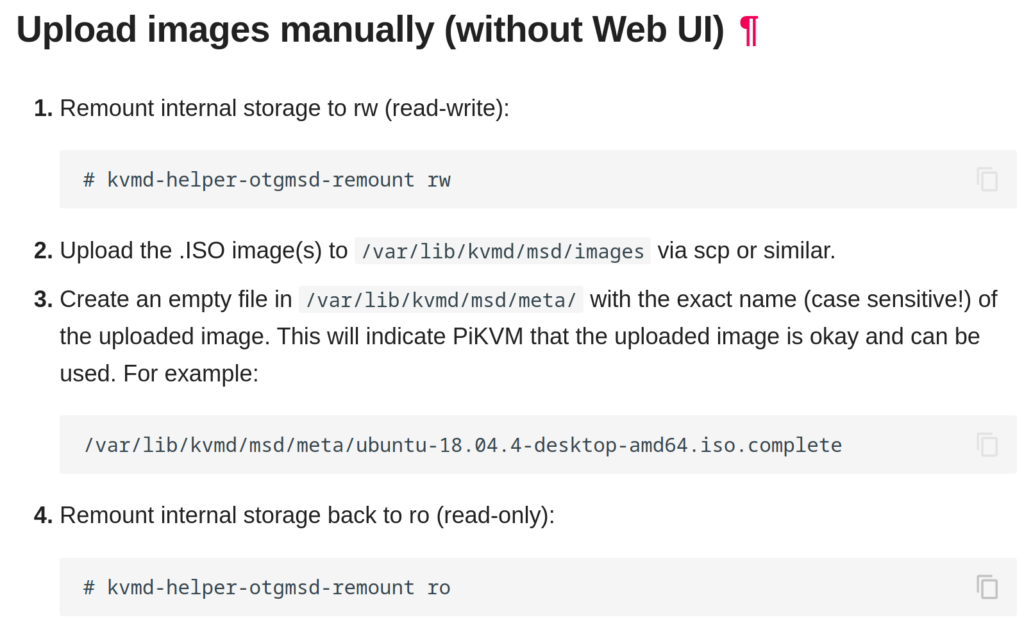
I used the command: “scp clonezilla-live-3.0.2-21-amd64.iso root@10.10.10.1:/var/lib/kvmd/msd/images” followed by “touch /var/lib/kvmd/msd/meta/clonezilla-live-3.0.2-21-amd64.iso“. The “scp”-command seems to be much more stable, as there were no errors and it worked the first time. My guess after this success is that maybe the web UI used UDP and scp uses TCP-protocol, which will automatically retransmit on errors (I’m not sure, if you have an idea or know about it, please write it in a comment)? I didn’t check it but it makes sense that the WiFi-connection wasn’t ideal or perfect because I actually had 1-2 walls between the BLiKVM and my office/laptop and once in a while I shortly lost the display for 2-3 seconds (and then it was stable for some minutes, again I suspect the walls, signal strength or maybe radio interference).
Demonstration
Having solved the problems described above I also managed to create a full-disk backup of my Proxmox (and virtualized pfSense)-server, without physically attaching either a monitor or keyboard/mouse:
I can now use BLiKVM to boot into Proxmox – and shut it down – enter the BIOS – or do whatever I need to, using the builtin BLiKVM WiFi-hotspot:
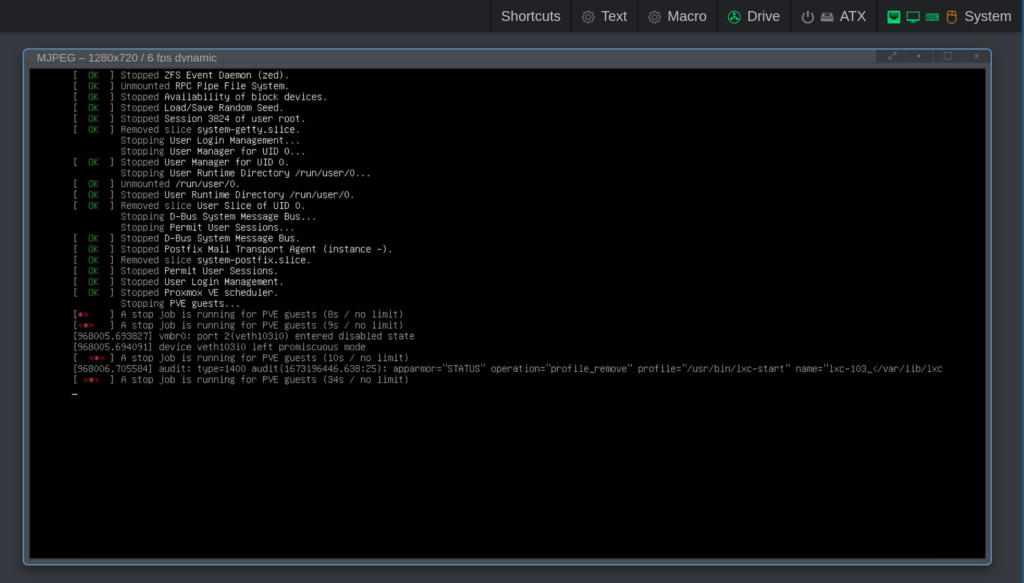
Unfortunately – or maybe I should say “luckily”, I don’t have any Proxmox-problems to show at this moment. But I think I’ve also shown what I want to show… When Proxmox fails to boot up correctly, I can access the terminal, login as root, check system logs, restore, modify, fix configuration files – or if all else fails, I can restore the whole harddrive image from the Clonezilla-image.
I can however not access the Proxmox Web-UI via WiFi, even if the BLiKVM and the server starts up correctly. The reason is that the BLiKVM only accesses the display and provides keyboard/mouse input to the server – there’s no network connection between the BLiKVM and the machine it’s attached or connected to. I think I remember that I have assigned a special (physical) emergency LAN-port to passthrough to the pfSense-server, but that requires me to plugin a network cable from my laptop, to the Proxmox/pfSense-server. In this case it’s nice that 10.10.10.0/24 doesn’t conflict with 192.168.1.0/24 (but hopefully I won’t be needing that ever, it’s just an extra safety precaution).
Conclusion
I can highly recommend this setup and KVM-solution and if you do as above, things should work out just fine. There have been some minor problems along the way, but Open Source is full of challenges one has to solve/fix and that’s just how it is. My contribution here is to describe these things so other people better can decide if they want to buy the same KVM-solution I did and I think this post can save some people both time and frustrations.
Thanks for reading all this. I hope this blog post was useful or maybe even inspiring to some people. If you find this to be useful, find any mistakes, omissions or have relevant comments, ideas etc, please write below and/or contact me directly, thanks (sorry, it can take up to a week or so for me to get back).
18 replies on “Why and how I use KVM over IP with the BliKVM-box, based on the Raspberry Pi Compute Module 4”
The articles you write help me a lot and I like the topic
Thanks a lot, that’s encouring to hear! I have at least 2 good ideas for future blog posts, but am I bit busy so I think I’ll only write a single blog post in February – but a single blog post (in average) per month is also my realistic goal as every post takes a lot of time (and what readers don’t see is that I have some e.g. wordpress-plugins complaining about my [low] SEO-score – behind the scenes there are things other than writing that takes up time, but it’s encouring with feedback).
Thank you for your help and this post. It’s been great.
It抯 in reality a great and helpful piece of information. I am happy that you simply shared this helpful information with us. Please keep us informed like this. Thank you for sharing.
Hi I am so excited I found your blog, I really foundyou by error, while I was browsing on Bing for something else, Regardless I am here now and wouldjust like to say many thanks for a remarkable post and a allround exciting blog (I also love the theme/design), I don’thave time to read it all at the minute but I have book-markedit and also added your RSS feeds, so when I have time I willbe back to read more, Please do keep up the fantastic work.
Thank you – for many reasons, I haven’t really had much time for the past months and I have a few things that currently take up a lot of my sparetime. When I get more sparetime, I expect to resume and post again, thanks!
You’re so awesome! I don’t believe I have read a single thing like that before. So great to find someone with some original thoughts on this topic. Really.. thank you for starting this up. This website is something that is needed on the internet, someone with a little originality!